This is a quick post on how to run multiple instances of AdGuard@Home on a single Synology host using Docker.
Problem: you cannot easily, using Docker, run multiple instances of the same program - or different program - while listening on the same port.

Solution: do not use host or bridge networking, but put the container on the same network as the host using macvlan.
To achieve this, we need to do the following:
Prerequisites
- Find the name of the network interface your Synology is using to connect to the network you want your Docker containers to be running on. This can be for instance eth0 for a single interface, or bond0 for when you use channel bonding. You can find this under Control Panel > Network > Network interface. In my case, this is bond0 which is what I will use in the examples below.
Configuring the interface
Now we have to configure the interface Docker can use. We do this by adding a bridge on top of the existing physical interface you use on your network.
- ip link add macvlan-br0 link bond0 type macvlan mode bridge
This adds a bridge device on top of the physical interface with the name macvlan-br0 - ip addr add 192.168.0.254/32 dev macvlan-br0
This adds an IP address on the bridge device so the host has an IP address in the range will give to Docker - ip link set macvlan-br0 up
This will activate the virtual bridge device - ip route add 192.168.0.192/26 dev macvlan-br0
This will add a route to the Docker network so it can be reached
You will have to put this in a script you can run at boot of your Synology device, as these settings will not retain over a reboot as we have to make them on the commandline and cannot make them in the Synology DSM.
#!/bin/bash
#
# Set timeout to wait host network is up and running
sleep 60
#
# Recreate the host macvlan bridge
ip link add macvlan-br0 link bond0 type macvlan mode bridge
ip addr add 192.168.0.254/32 dev macvlan-br0
ip link set macvlan-br0 up
ip route add 192.168.0.192/26 dev macvlan-br0
Docker
Now that we have set up the host, we can continue creating a new network in Docker that can be used by our containers. To do this, type:
docker network create -d macvlan \
  --subnet=192.168.0.0/24 \
  --gateway=192.168.0.1 \
  --ip-range=192.168.0.192/26 \
  --aux-address 'host=192.168.0.50' \
  -o parent=bond0 macvlan-br0
This will create a network in Docker on the subnet of your network in a dedicated range of IP addresses using your physical interface and virtual bridge device.
Do make sure the IP range you specify for Docker is not part of your DHCP scope, if you are also running DHCP or you will get IP conflicts. Docker does not use DHCP, and instead will just hand out IP addresses from this range in order to each container.
Now you can create your Docker containers as usual and configure them to use this network, instead of the standard host or bridge networks Docker uses by default. You can also assign this network to existing containers if you want.
Install container
To install AdGuard@Home on your Synology, open Docker, go to “Registry” and search for “adguard”

Double click to download the latest version.
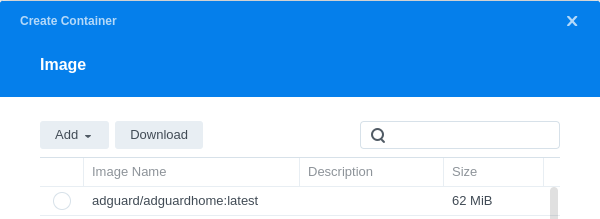
When it is done downloading, you can go to the “Container” section, and hit create. A window will popup where you can select your freshly downloaded image.

Select it and click next to follow the instructions. Configure what you want, but make sure to select the macvlan network when you get to the screen to pick the network.

Congratulations! Test your new container that is now present on your local network.
Important note: if you are running the DNS server on your Synology for your local network, and you want to keep using that, make sure you configure your AdGuard as DNS for your clients, and add the following to your AdGuard DNS configuration under upstream servers:

[/domain.local/]192.168.0.254:53

This will instruct AdGuard to use the IP address you added to your bridge device at the beginning as the source for resolving domain.local hosts.

The complete upstream section for me looks something like (I use Cloudfare DNS for internet, and Synology DNS for local addresses):
tls://1.1.1.1
tls://1.0.0.1
[/domain.local/]192.168.0.254:53

Do not use the real IP address of your Synology host; this is not reachable for Docker and will not work! Use the bridge device address instead.
